CryptoPhoto for Atmail
Before being able to deploy the CryptoPhoto Atmail plugin and component, you must register a new CryptoPhoto administration account and obtain API Keys, which will be used to configure CryptoPhoto for Atmail.
Creating and configuring a CryptoPhoto administration account is described here.
Download the Atmail distribution zip file
CryptoPhoto Atmail 7 Distribution: cryptophoto-1.20160608.atmail.zip
( Older atmail versions use this: cryptophoto-1.20131017.atmail.zip )Guided Tour
Follow a guided tour of installing the Atmail CryptoPhoto plugin or how to use CryptoPhoto as an Atmail user:
Admin Guided Tour
User Guided Tour
Install & Configure
Extract the contents of the zip file. You will get two Atmail installable tgz archives and a readme file.
CryptophotoAdmin.tgz

CryptophotoUser.tgz

Readme.txt
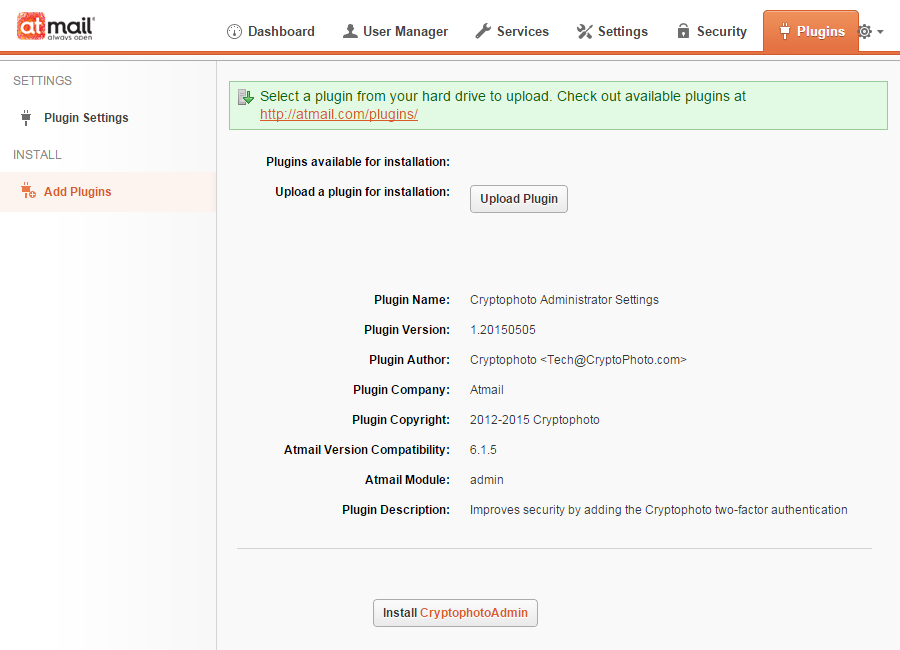
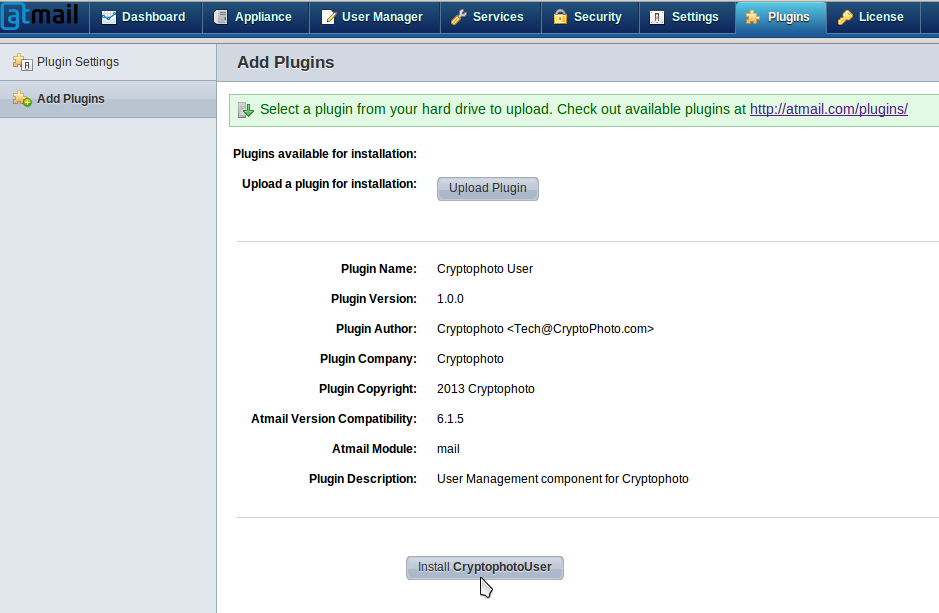
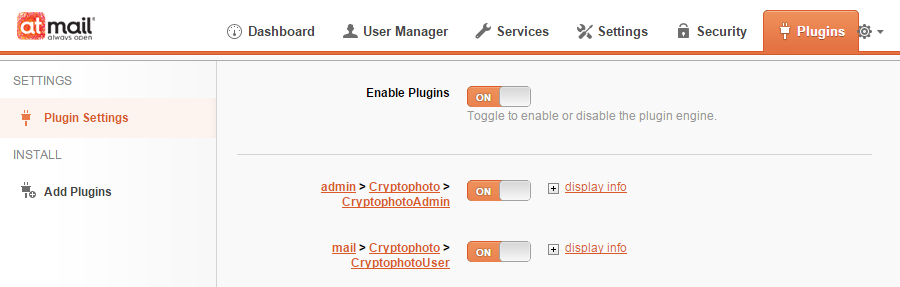
Install the CryptoPhoto plugins using the Plugins/Add Plugins section of your Atmail Site Administrator. Both the plugins must be installed in order for the Cryptophoto mechanism to work properly.
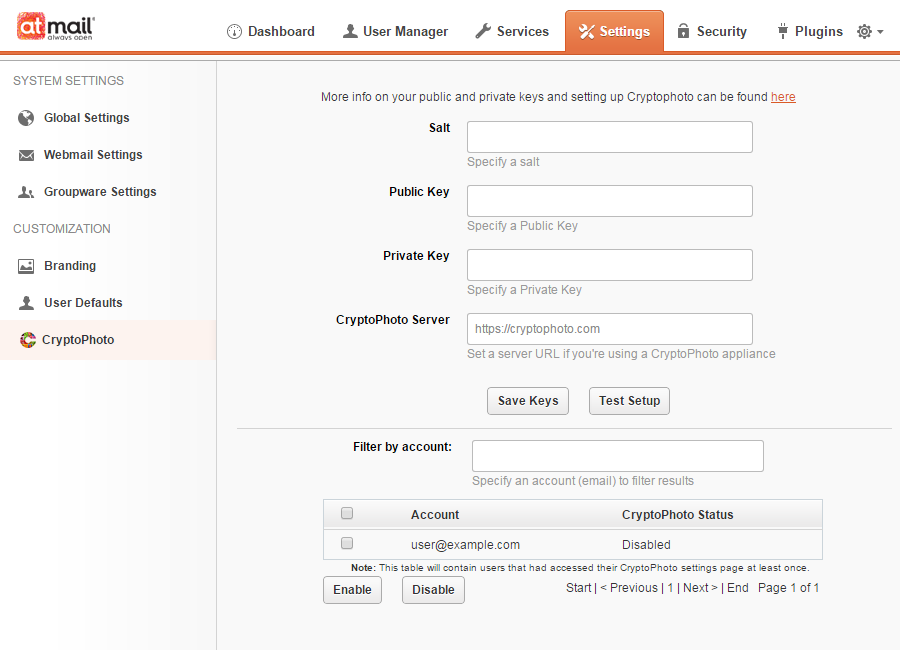
Once installed and enabled, you can start configuring CryptoPhoto for Atmail. First we need to set the API Keys that will be used with the CryptoPhoto deployment. You can find the CryptoPhoto Settings page in the Settings/Cryptophoto section of your Atmail WebAdmin.
Complete the Cryptophoto setup by setting the values of the private and public keys variables to the values of the API keys you received when you created your CryptoPhoto account. Also set the value of the salt*. Don't forget to press the "Save Settings" (Amtail 7: "Save Keys") button at the top-right of the screen to preserve your changes. After saving your settings, press "Test Setup" to verify your settings.
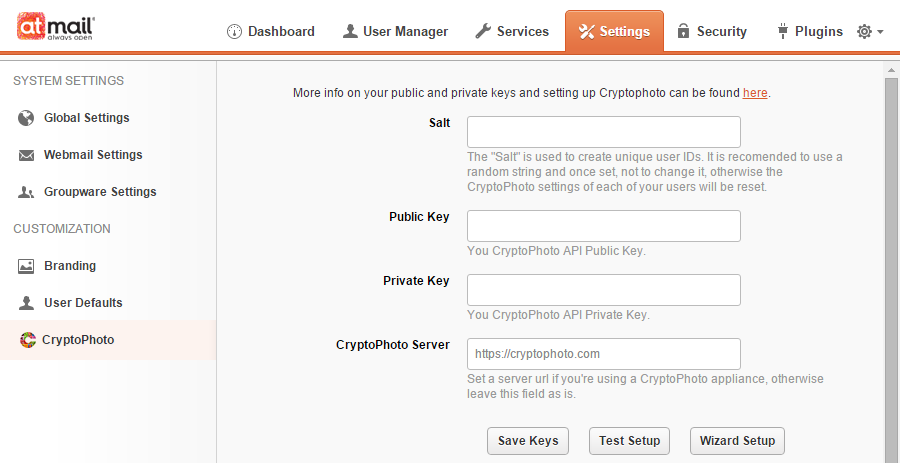
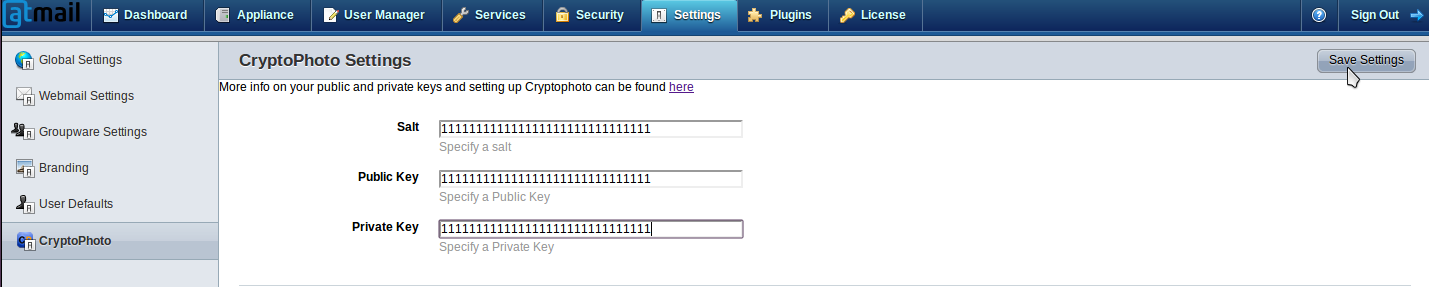
*Note: The "Salt" is used to create unique user IDs. It is recommended to use a random string. Once set to a certain value, do not to change it, or the CryptoPhoto settings for all the site users will be reset.
Note: You can use the "Wizard Setup" button to start the wizard plugin configuration which will take care of configuring the API keys and salt for you.
Activate the CryptoPhoto Service
After installation, there will be two new entries in the list of installed plugins, which is displayed in the Plugins/Plugin Settings section of your Atmail WebAdmin. In your WebAdmin /Plugin Settings section, make sure that the two Cryptophoto plugins (CryptophotoAdmin and CryptophotoUser) are both enabled. Cryptophoto will not work properly if only one of the two plugins is enabled. Don't forget to press the "Save Settings" button at the top-right of the screen to keep your changes.

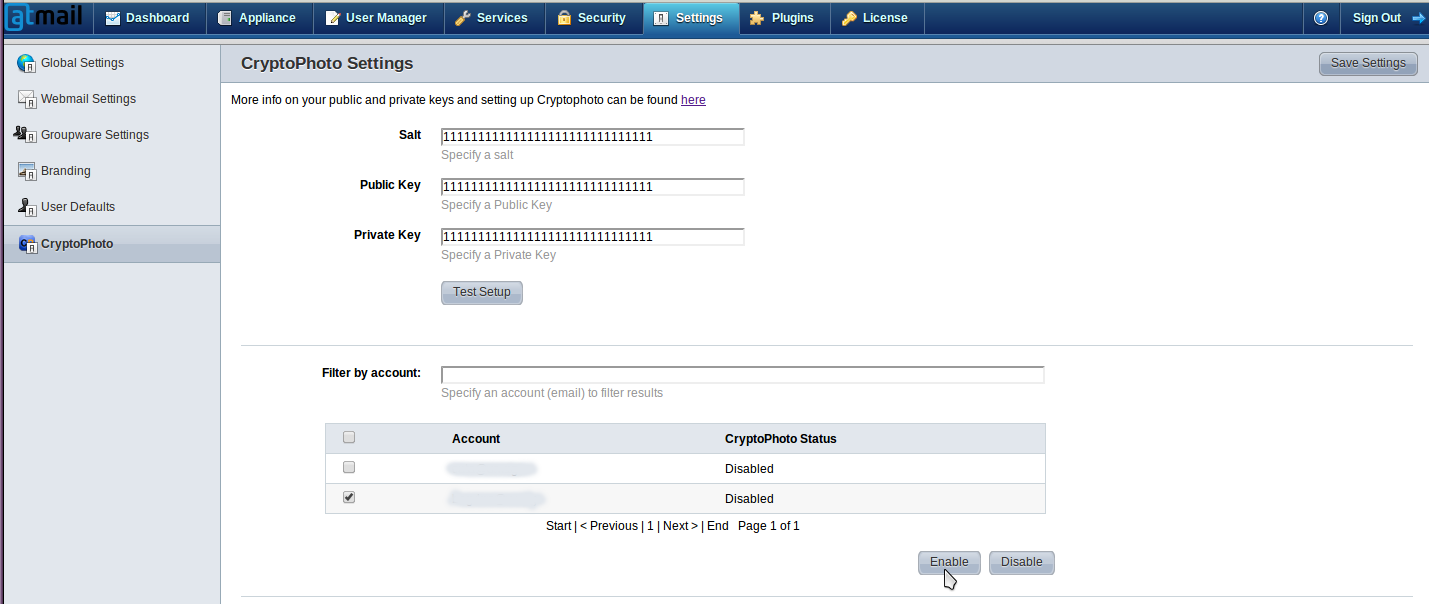
User management is available on the /Cryptophoto section of your Atmail WebAdmin. Users' CryptoPhoto status can be activated or deactivated using the user checkboxes and the Enable/Disable buttons. Search filtering by user names and pagination options are also available here.
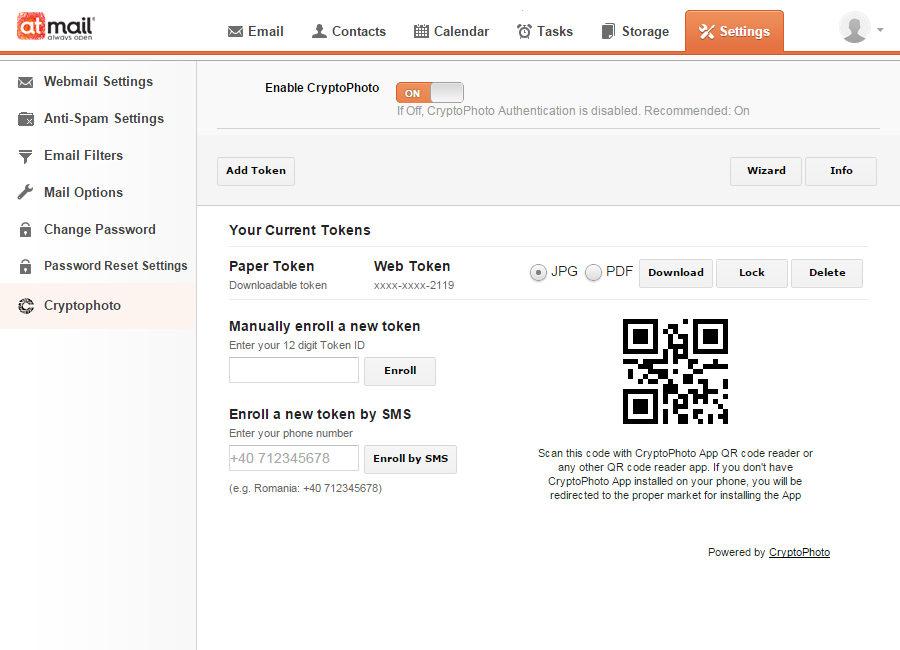
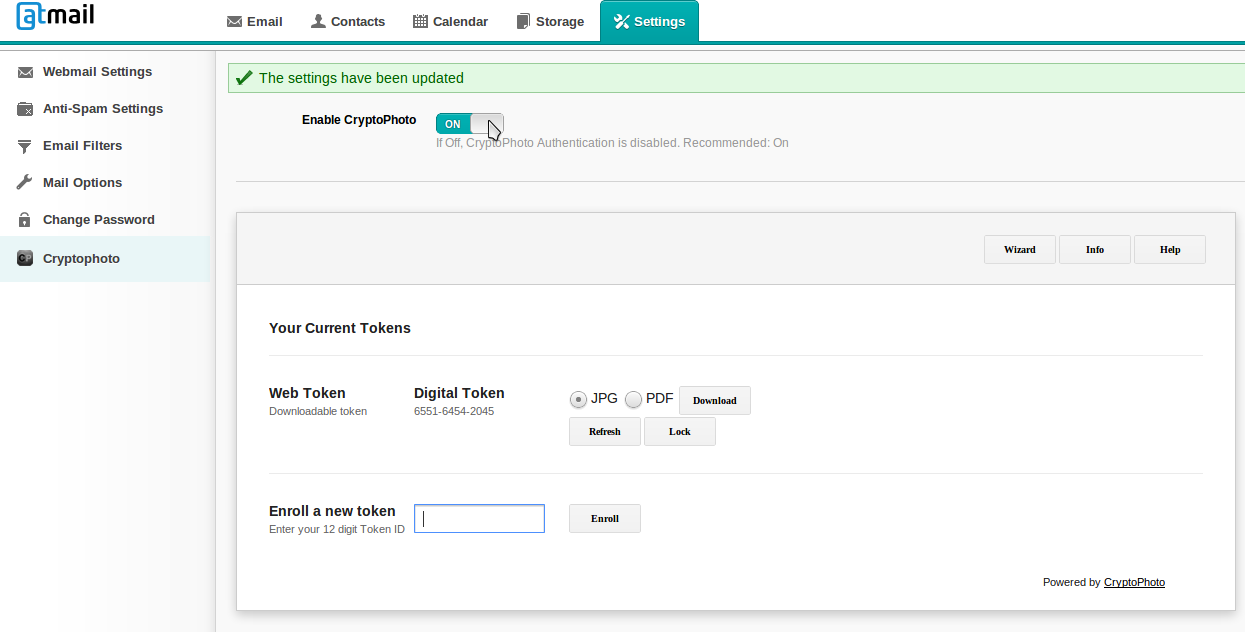
After you've enabled the extensions, users can activate/deactivate their CryptoPhoto services by accessing the CryptoPhoto through the Settings/Cryptophoto menu item in their account. From this point on, your users can download/enroll new tokens and opt-in for CryptoPhoto Authentication. The CryptoPhoto page will be available for all your Atmail users. The CryptoPhoto Authentication form will appear as a secondary login form to all the users whose CryptoPhoto service is enabled.
Uninstall CryptoPhoto
To uninstall both the CryptoPhoto plugins, you need to remove them manually. This is a bit of an inconvenient process, so it would be easier to simply disable the two plugins in case you decide to discontinue using the CryptoPhoto service. For detailed instructions on removing the CryptoPhoto plugins, check the uninstall section
Note Having only one of the CryptoPhoto plugins removed and the other one enabled, will compromise all the CryptoPhoto functionality of your site.
 Loading ...