CryptoPhoto for WordPress
Before being able to deploy the CryptoPhoto Wordpress plugin, you must register a new CryptoPhoto administration account and obtain API Keys, which will be used to configure the extension.
Creating and configuring a CryptoPhoto administration account is described here.
Download the WordPress distribution Zip file
CryptoPhoto WordPress distribution: cryptophoto-1.20180612.wordpress.zip
Install CryptoPhoto
MANUAL INSTALLATION
- Download the cryptophoto-1.20180612.wordpress.zip archive
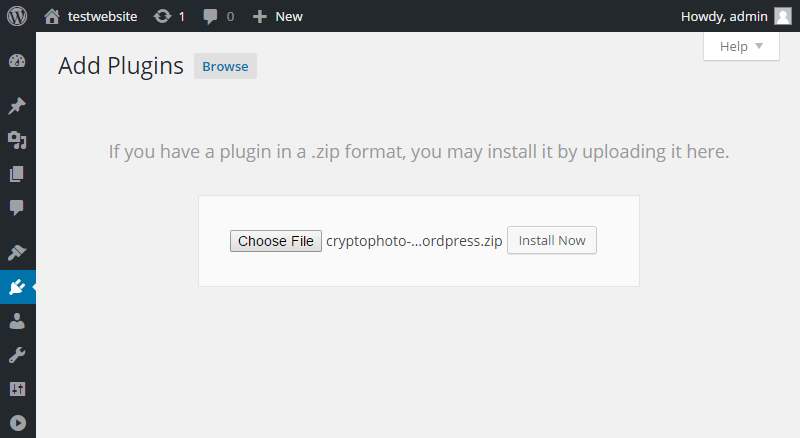
- Upload* the plugin to your WordPress site using the regular Add New and Upload options of your Plugins menu
- Install the plugin
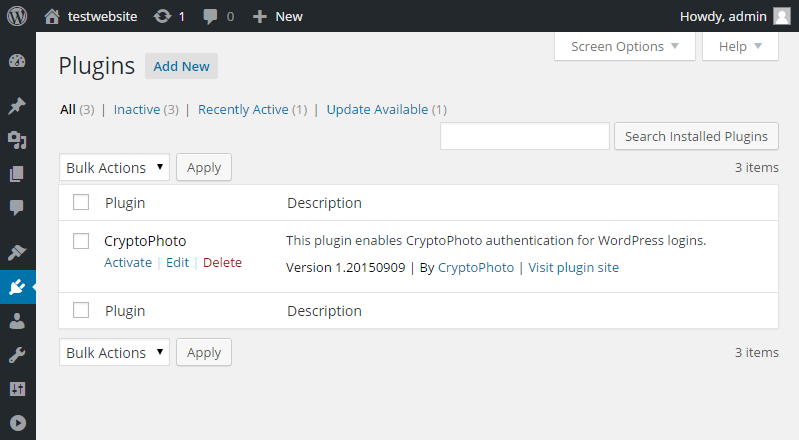
- Activate the plugin
*To enable file uploads, add the following line to your wp-config.php file: define('FS_METHOD', 'direct');
You can activate the CryptoPhoto plugin right after installation, by selecting the "Activate Plugin" option. Or, you can also activate the CryptoPhoto plugin from your Plugins section of the blog's administrator dashboard. Underneath the CryptoPhoto Authentication plugin, select the "Activate" option.
Configure CryptoPhoto
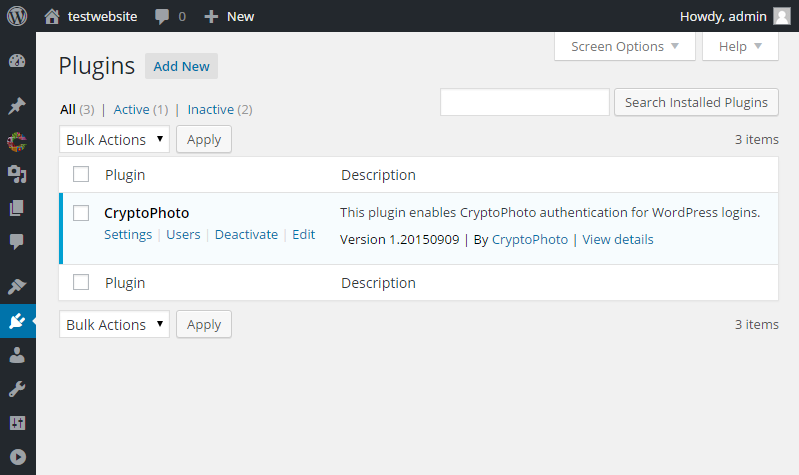
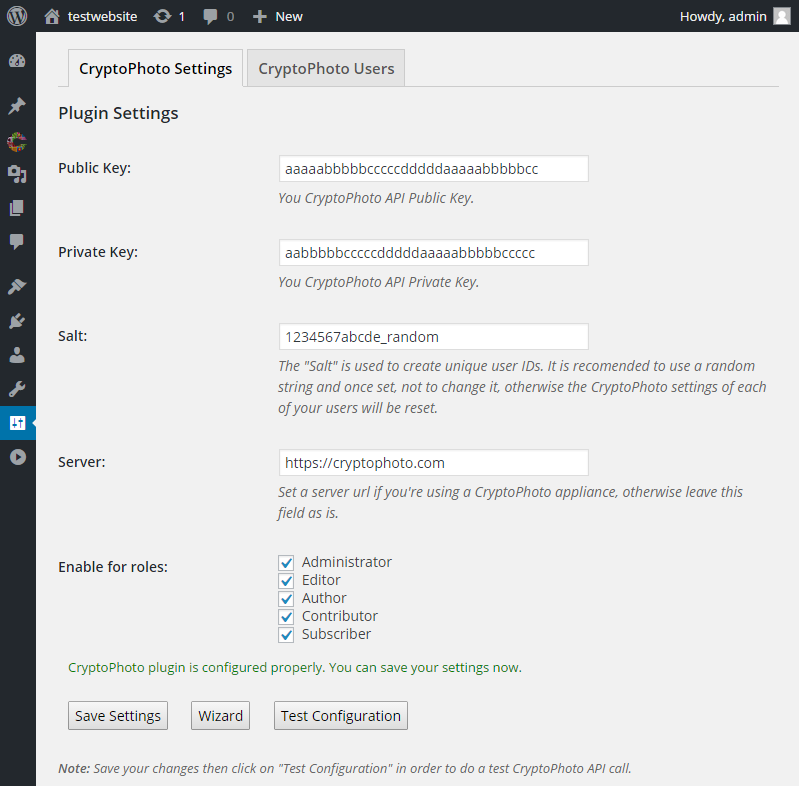
- Click on the Settings option of the CryptoPhoto Authentication plugin. You can also access this page using the Settings/CryptoPhoto option of the menu
- Set the values of the public and private keys to match the API keys you received from CryptoPhoto when you created your administration account
- Set the value of your custom salt here (a random or preferred string)
Once the plugin is installed, you can start configuring CryptoPhoto for your WordPress blog. First we need to set the API Keys that will be used with your CryptoPhoto deployment. In your Plugins section of the administrator dashboard, click on the 'Settings' option of the CryptoPhoto Authentication plugin.
Set the values of the public and private keys to match the API keys you received from CryptoPhoto when you created your administration account. Also set the value of your custom salt here.
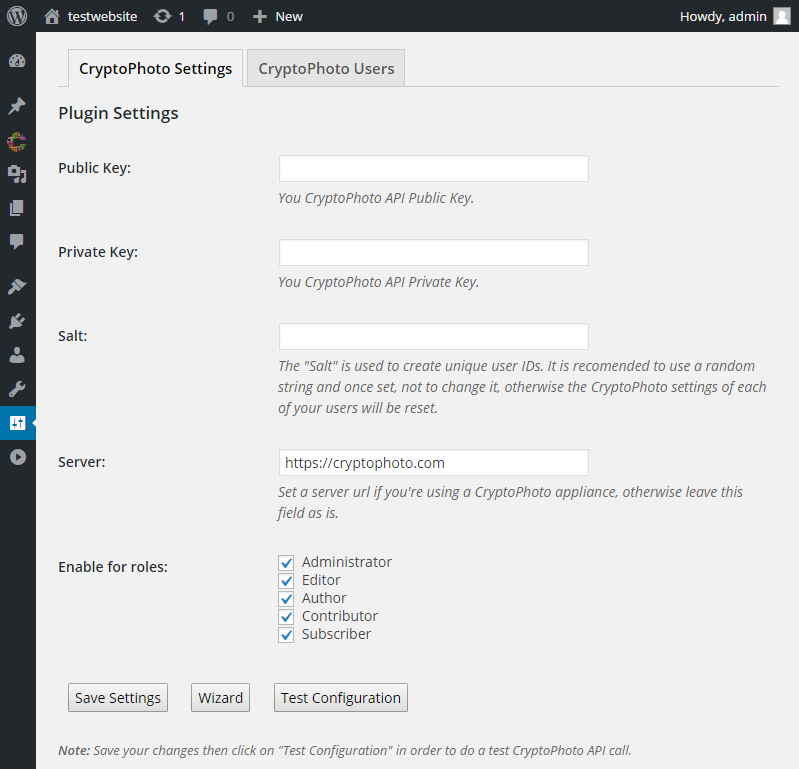
Note: The "Salt" is used to create unique user IDs. It is recomended to use a random string and once set, not to change it, otherwise the CryptoPhoto settings of each of your users will be reset.
Note: You can use the "Wizard" button to start the wizard plugin configuration which will take care of configuring the API keys and salt for you.
- Use the "Test Configuration" button to verify your configuration
- If successful, your plugin is properly installed and configured
- If case an error message follows the test:
- check the error message and act accordingly
- check that your plugin is properly installed and that you followed correctly the steps above
- retry to install and configure the plugin, using this guide
- contact
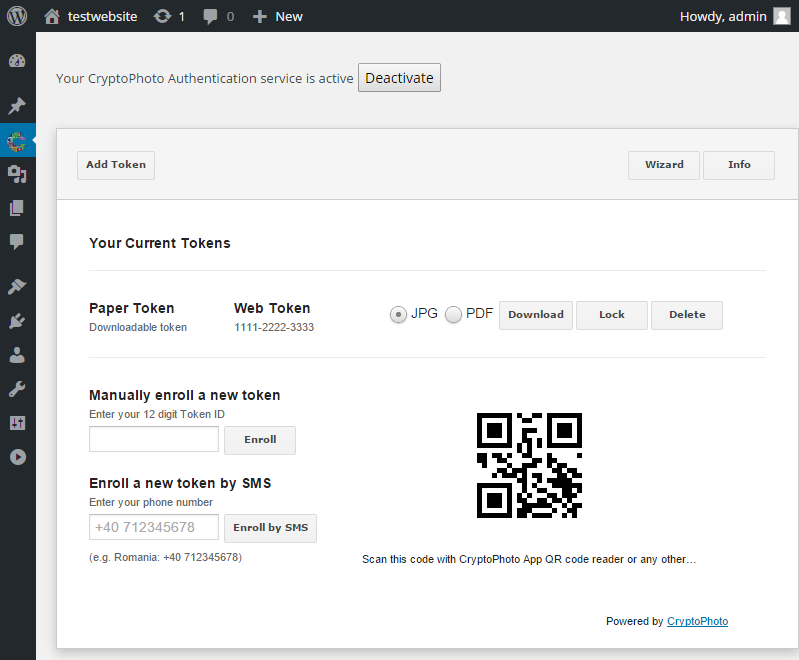
Activate CryptoPhoto Service
From this point on, your users can download/enroll new tokens and opt-in for CryptoPhoto Authentication.
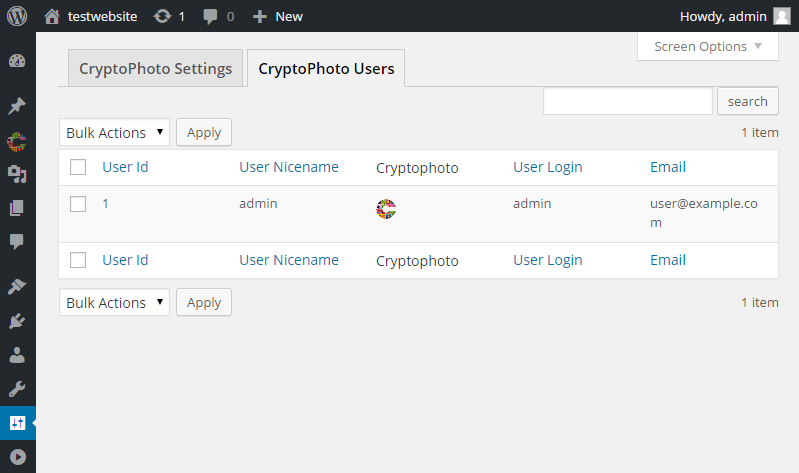
The Wordpress admin user has access to individual user management, available on the CryptoPhoto Users page. The CryptoPhoto status of any user can be activated or deactivated using the enable/disable switches. Search filters, ordering users and bulk actions are also available here.
Disable and Uninstall CryptoPhoto
You can deactivate the Cryptophoto plugin from the "Plugins" section of your WordPress administrator account. To delete the extension and all its files, you must first deactivate the plugin using the options provided in the "Plugins" section of your WordPress admin account. Once deactivated, a "delete" option becomes available for the plugin, which will remove all the extension's files and folders.

 Loading ...